If you’re looking for an advanced form builder for your WordPress site, there’s only a handful that are worth mentioning. Currently, Gravity Forms and Ninja Forms are by far the most popular. Gravity Forms has been around longer, but Ninja Forms was created as a visual form builder that took a different approach.
So which one is better for website visitors? Let’s find out. I’ve done a head-to-head comparison of all major aspects of an advanced form builder (beyond a contact form), broken down by category.
My goal with this form maker comparison review is to make it crystal clear which online forms tool is better suited for your situation.
Bottom Line Up Front Summary: If I had to pick an overall winner, I’d go with Ninja Forms. Their interface is cleaner and a bit easier to use, and certain advanced features are also a bit easier to use, especially as you move beyond a basic contact form.

Personally, I much prefer the easier-to-use visual form builder on NinjaForms AND the more responsive customer support. No pressure, but if you are stuck then go with NinjaForms.
Ninja Forms vs Gravity Forms Pricing and Plans Features
Cost is often the biggest factor when choosing to buy a new tool. The only way to use Gravity Forms is to buy a plan on a yearly basis.
Ninja Forms is similar, in that they offer 3 plans, all on an annual basis. However, they also have a free version plan that contains their powerful core form builder. It doesn’t have any extras but is much better than most other free form builders.
Assuming you need advanced functionality, like being able to integrate with an email marketing tool, or allow file uploads, let’s take a look at the paid plans. I’ve put together a summary table of the plans each tool offers, along with the main features on each plan. Each tier higher includes everything from the plans below it.
At each level, Ninja Forms is more expensive than Gravity Forms, even though they offer similar key features. So if price is your main concern, Gravity Forms will almost always be your best choice than Ninja Forms.
But the quality of features is also important, perhaps Ninja Forms is worth the extra cost for more advanced contact forms. That’s what the rest of this review will look at.
| Gravity Form Builder | Ninja Forms Builder | |||||
|---|---|---|---|---|---|---|
| Basic | Pro | Elite | Personal | Professional | Agency | |
| $59/year | $159/year | $259/year | $99/year | $199/year | $499/year | |
| 1 site | 3 sites | Unlimited sites | 1 site | 20 sites | Unlimited sites | |
| Conditional Logic | Pro add-ons (mainly chat and CRM integrations) | Elite add-ons (polls, quizzes, Stripe, and more) | 20% discount off add-ons | 40% discount off add-ons | All add-ons included | |
| Standard Support | Priority Support | Standard support | Better support | Priority support | ||
| Email marketing add-ons | WordPress Multi-Site | Conditional Logic | Email marketing integration | |||
| Multi-Page Forms | Multi-Page Forms | PDF form submission | ||||
| File Uploads | File Uploads |
A Few Notes About Gravity Forms Pricing

As mentioned, there’s no free plan, or even free trial to try out Gravity Forms. However, you can create your own demo site that comes fully stocked with all available add-ons. The demo site is a basic WordPress website that will let you get familiar with how Gravity Forms feels and works. Of course, you can’t use the forms you create here on your actual site, this is just a testing ground.
The demo site lasts for 7 days after you stop logging in to it. Finally, Gravity Forms does have a refund policy, which lets them give refunds on a case-by-case basis. But there’s no formal money-back guarantee, which is why it’s a good idea to make sure you like the demo version first.
A Few Notes About Ninja Forms Pricing
I highly recommend installing the free version Ninja Forms plugin (free plugin) on your site and giving it a try. It contains the core form builder and dozens of custom fields (form fields) that you can add to it. If you end up liking it, you can purchase a license and paste it into the settings while retaining any forms you’ve created.
Ninja Forms also offers a 14-day money-back guarantee. Finally, the most important thing about Ninja Forms is understanding their extensions (sometimes referred to as “addons”). With the free plan, you can purchase addons individually, so you only get the features you need.
But they’re still pretty expensive, which is why it usually makes sense to buy one of the plans we looked at. These come with a bundle of popular addons, and it works out to a much cheaper price than buying them individually.
For instance, you’ll see in the table that email newsletter integration and CRM integration (e.g. MailChimp, AWeber, Insightly CRM, etc.) are only part of the agency plan. But that doesn’t mean that you can’t buy the MailChimp (for example) add-on individually on top of any one of the other plans (including the free one).
Ninja Forms is very flexible and can cost less if you need very specific add-ons that Gravity Forms only offers in their highest tier plan(s).
Personally, I much prefer the easier-to-use visual form builder on NinjaForms AND the more responsive customer support. No pressure, but if you are stuck then go with NinjaForms.
Installation and Ease of Use
Beyond features and price, it’s important that tools are easy to use. In this case, specifically to integrate with your WordPress theme and manged via your WordPress dashboard.
Otherwise, you waste your time and can get frustrated. A good tool feels good to use and is intuitive. Let me quickly go over how to get up and running with both WordPress form plugin options before we dive into the features.
Gravity Forms
Once you purchase one of Gravity Forms’ plans, you’ll be given a form builder plugin for WordPress file to download. You can upload this form plugin in your WordPress plugin section like any other WordPress plugin: Once installed and activated, you’ll find that there’s a new “Forms” menu option along with your side menu.
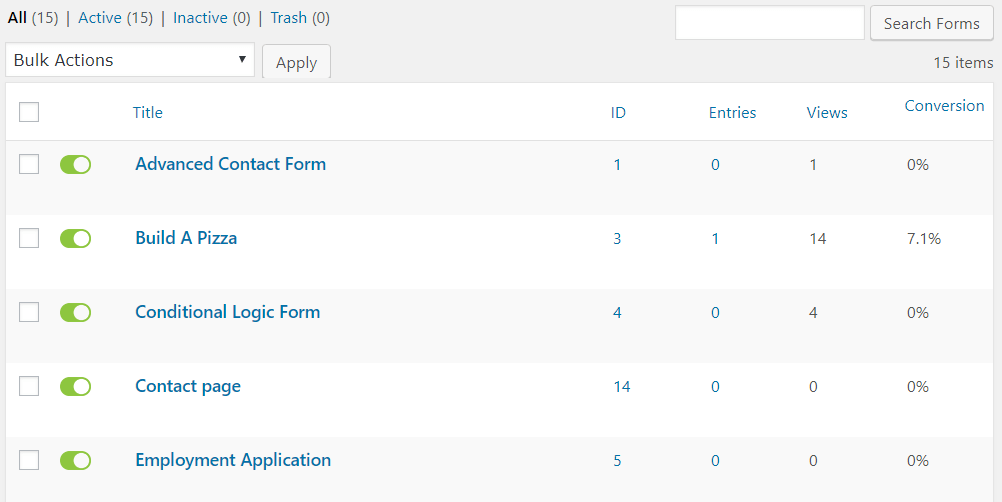
The default screen is a page of all your forms, where you can see a table of how many form entries, views, and conversions each one has had. You can also click on them to edit them or create a new one using the “add new” button on the page. Pretty straightforward and intuitive so far.
Ninja Form
You’ll find Ninja Forms with a simple search in the form plugin tab of your WordPress backend (accessible via the WordPress plugin repository):
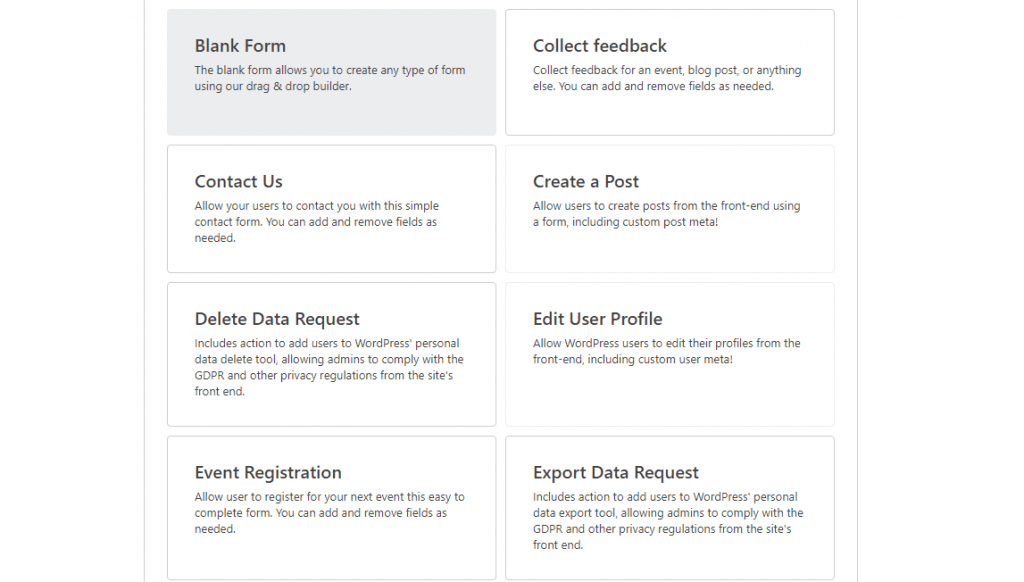
Since Ninja Forms is so popular, it’s not hard to find. This is the free version for now (good for a basic feedback form or simple contact form functionally, not ideal for more complex form use cases). You can input a paid license number later. Install and activate it, and you’ll see a new menu option called “Ninja Forms” on the left sidebar.
Again, the dashboard has a list of any forms you’ve made. Both plugins are easy to get started with, although Ninja Forms’ interface is a bit prettier.
Core Form Builder Features Comparison
Arguably the most important part of each form plugin is how easy it is to create a form. So let’s go over how intuitive the core form builder is.
Gravity Forms Features
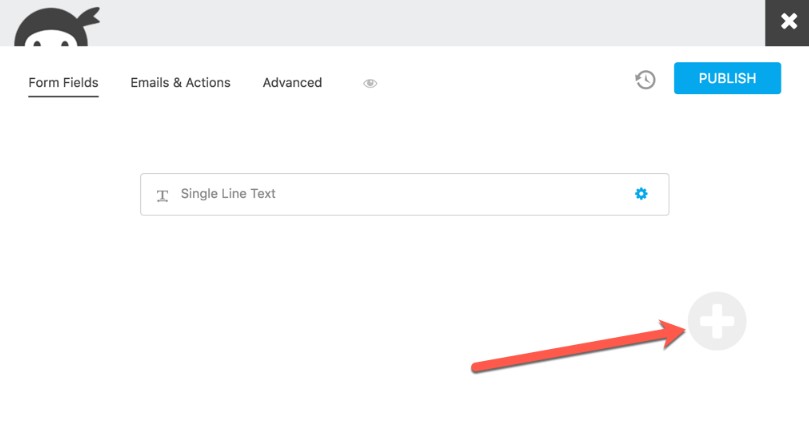
Clicking the “add new” button at the top of your dashboard will open up the form editor. By default, the page has detailed instructions with images, which is great for your first few times. All the field types are located on the right panel menu. You apply the simple drag and drop builder over any field over to the left side to actually build your form.

Here’s a brief preview of the drag and drop builder editor:
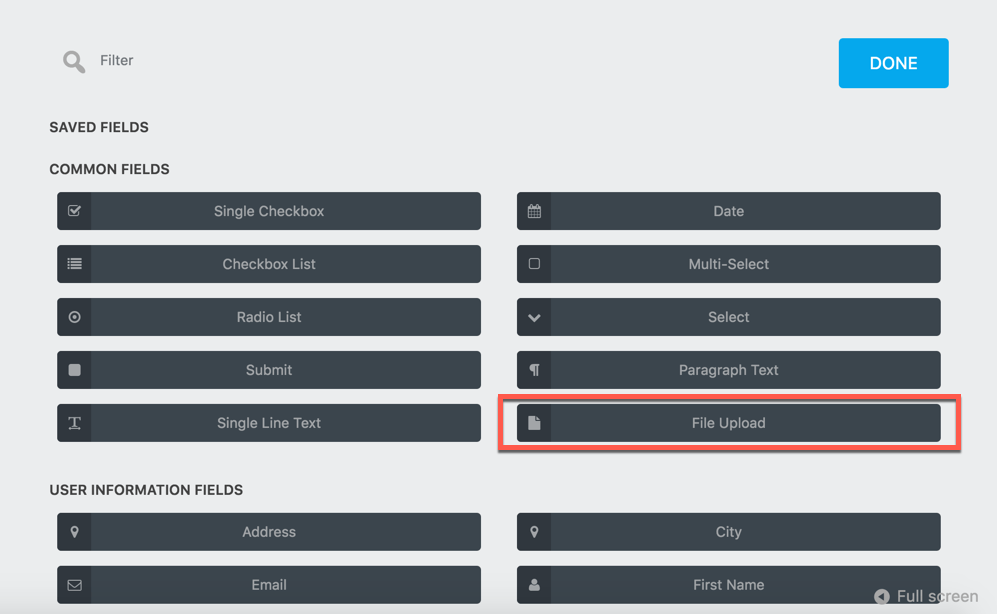
There are dozens of form fields you can add to your form. Clicking on a field on the left panel will let you edit it. You have full control over text and can add a custom CSS class to it.
You’ll notice that your form is rather blank. That’s because it’s designed to inherit styling from your theme, which it can’t do in your WordPress users backend as contact form plugin (WordPress Admin section).
At any time you can click the preview button to load a new page that shows you what your form looks like with styling applied.
If you have an attractive theme, the form will likely look good as well.
However, there’s no easy way to alter the CSS from the plugin itself, so you’ll need to know a bit of CSS yourself if you’d like to change the appearance.
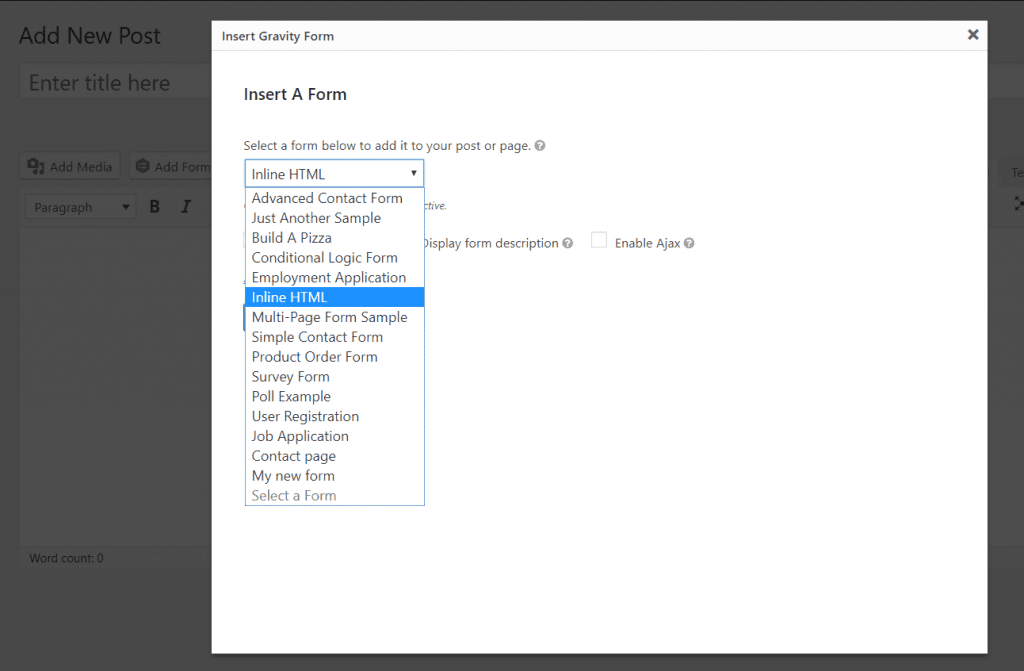
Finally, to insert a form onto a post or page, you use the new “add form” button above the standard WordPress text editor as a WordPress form builder. You simply pick your form from a dropdown menu:
Overall, building a form is quite simple, although having simpler styling options would be nice.
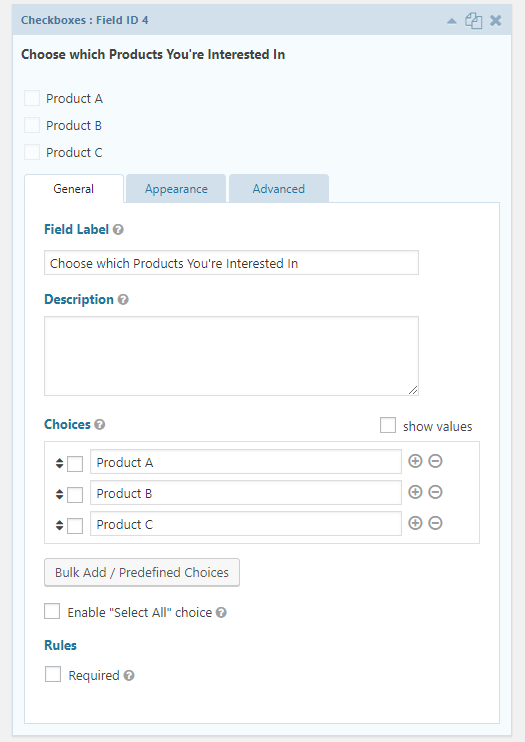
Ninja Forms Features
Ninja Forms also has an “add new form” option from the builder dashboard. One big difference is that you can choose from a variety of form templates (or start from scratch with the builder).
These templates come with form fields already added to your form, although you can edit them in any way you’d like. The Ninja Forms form editor is similar to Gravity Forms Gravity Forms, with your form on the left, and fields on the right. The builder interface is much cleaner and usable, and the form preview shows the styling that Ninja Forms applies to all forms by default.
When you click an element on your form, it will open up an options panel on the right where you can edit text, change the appearance, and even add custom CSS classes to individual elements. While you’ll still need to know CSS to make further styling changes, it’s simpler in Ninja Forms, and you have more finite control over element appearance if needed.
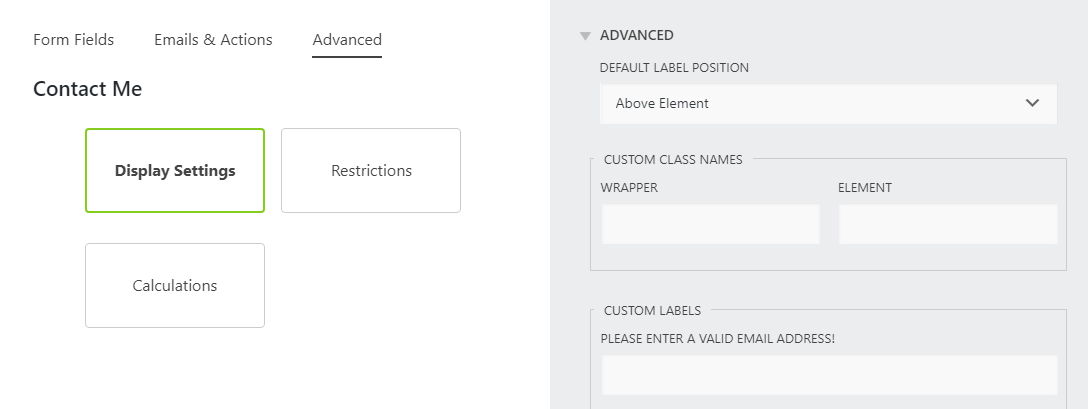
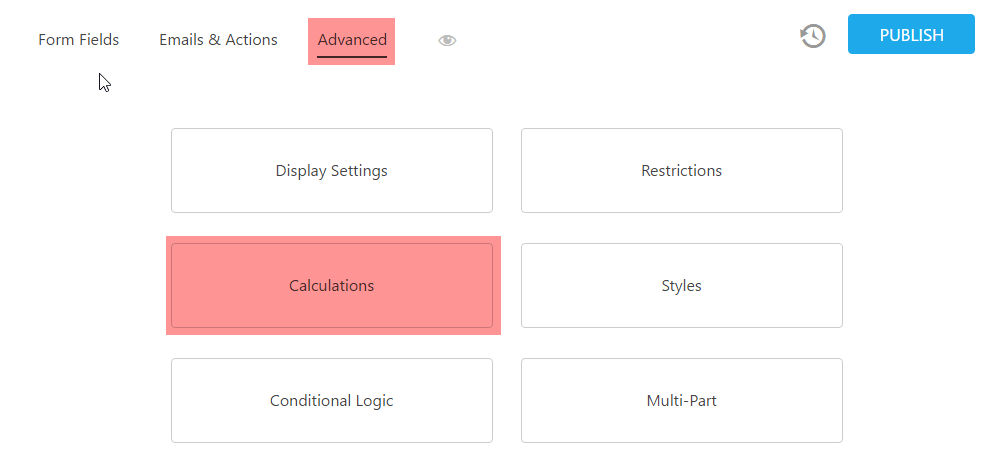
Finally, under the advanced section of the new form page, you can change default display settings, add restrictions, or access any advanced add-ons you’ve purchased (more on that later).
To add a form to a post or page, you have 2 options. The first is the same as Gravity Forms, using the newly added button above your text editor to pick a form from a dropdown list. The second is to add the form shortcode manually, which you’ll find beside each form on your dashboard.
Overall, both form creators are simple to use and will work without causing much frustration and bad user experience for most users. However, I’d give Ninja Forms the slight edge here based on its cleaner user interface, form preview, and extra control over CSS classes.
Integrations With Other Tools
Integrations are crucial for “advanced” forms since you’re dealing with features like email marketing and payment options (payment gateways or donation forms), which require other services and functionality. Both Gravity Forms and Ninja Forms offer a reasonably sized library of add-ons.
Gravity Forms
In WordPress, you can manage add-ons in the “add-ons” menu option for easy WordPress form creation. Depending on the plan you’re on, you’ll see different add-ons that are available to you. You can activate the ones you want to use since you likely won’t need them all.
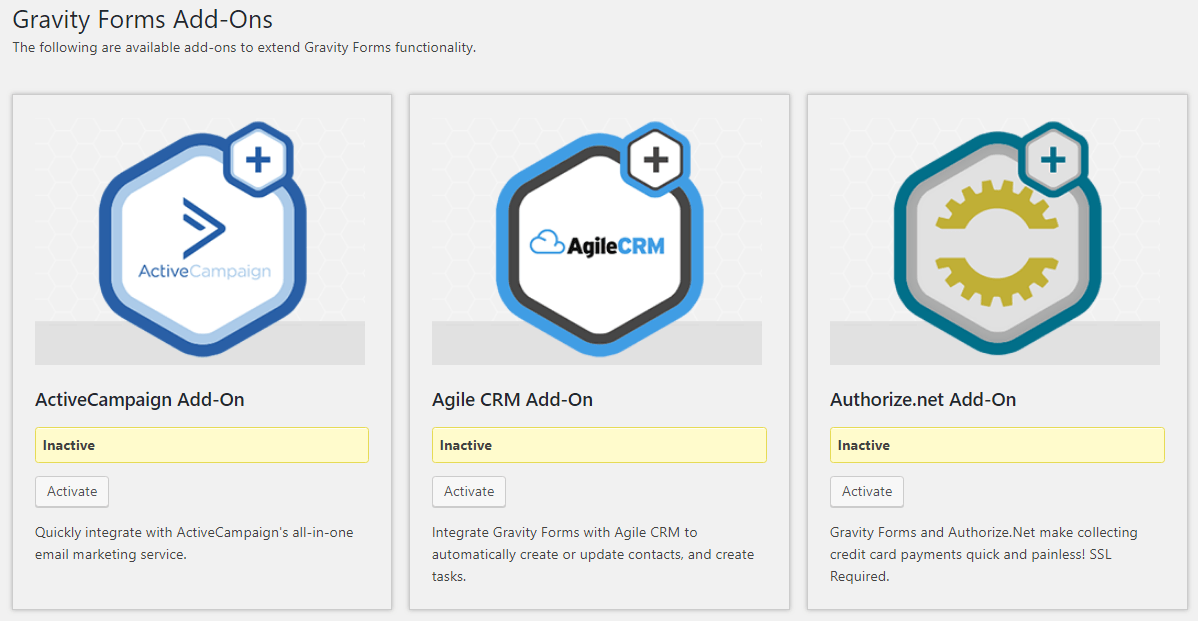
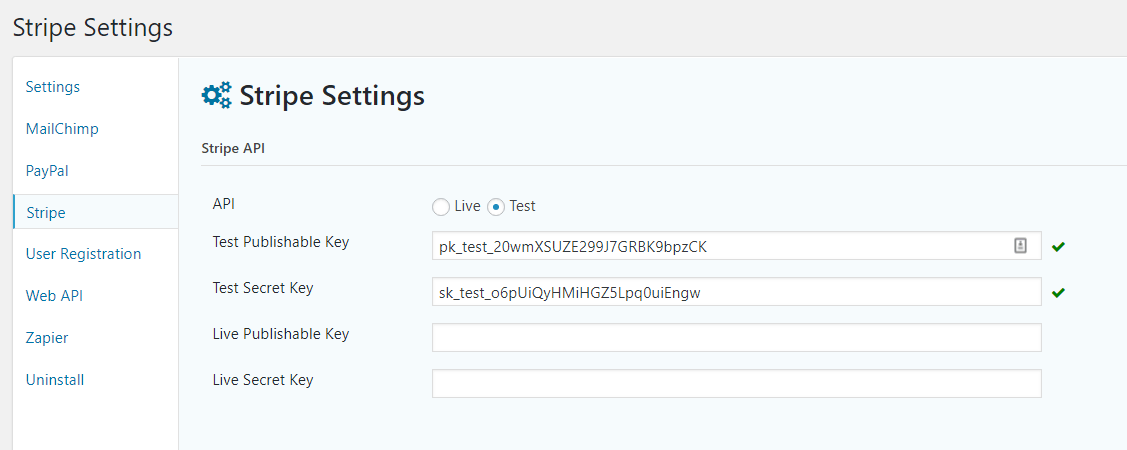
When you go into the settings menu for Gravity Forms, you’ll see all activated add-ons in the left panel of the screen:
You’ll need to go through each one and follow the instructions to get an add-on to work. In most cases, you just need to copy and paste API keys from the tool you’re trying to connect to.
What Integrations Does Gravity Forms Support?
You can find a full list of integrations here. Alternatively, here’s a list of current add-ons (including email marketing services), divided by the plans that they come with.
Basic Plan |
Pro Plan |
Elite Plan |
ActiveCampaign |
Agile CRM |
Authorize.net |
AWeber |
Batchbook |
Chained Selects |
Campaign Monitor |
Breeze |
Coupons |
CleverReach |
Campfire |
Partial Entries |
Emma |
Capsule CRM |
PayPal Payments Pro |
GetResponse |
Dropbox |
Polls |
iContact |
Freshbooks |
Quiz |
Mad Mimi |
Help Scout |
Signature |
MailChimp |
Highrise |
Stripe |
PayPal Payments Standard |
Survey Form |
|
Pipe Video Recording |
User Registration Forms |
|
Slack |
Webhooks |
|
Trello |
||
Twilio |
||
Zapier |
||
Zoho CRM |
Note that Gravity Forms may add new add-ons in the future, so if you’re looking for a specific one beyond the basic form that isn’t here, double-check their official website.
Ninja Forms

Ninja Forms Ninja Forms was created with the idea of add-ons in mind. Instead of paying for features, you don’t need, you can buy each individually if you’d like. Some of these are bundled together in the paid plans. If you buy them individually, the prices range from $29 to $129 per year, depending on the specific form builder plugin, and how many sites you need it for.
Add-ons are just additional WordPress plugins. When you buy new ones, you’ll be given a zip file to upload to your WordPress sites. Activating a plugin will add new options to the main Ninja Forms interface, you won’t actually have to go into each individual add-on plugin to use it.
What Integrations Do Ninja Forms Support?
Ninja Forms actively adds new extensions to their catalog, so it’s a good idea to take a look at their official extensions page. Most are similar to Gravity Forms, but both tools have a few integrations that the other doesn’t.
Here’s a list of the current most popular Ninja Forms add-ons:
- Conditional logic
- Multi-part forms
- Front-end posting
- File uploads/image uploads
- Layout and styles
- MailChimp
- Campaign Monitor
- Constant Contact
- AWeber
- PayPal Express
- Stripe
- Trello
- Zapier
Reporting, Data, and Statistics
It’s one thing to make a form, but you also need to be able to access the data you collect. It’s also convenient to see basic stats for forms like how many views and entries it’s received, instead of having to try and cross-reference your site analytics (e.g. Google Analytics).
Let’s see what both offer.
Gravity Forms
Gravity Forms offers this data right on the dashboard. Beside each form are the number of entries, views, and conversion rate (entries divided by views).
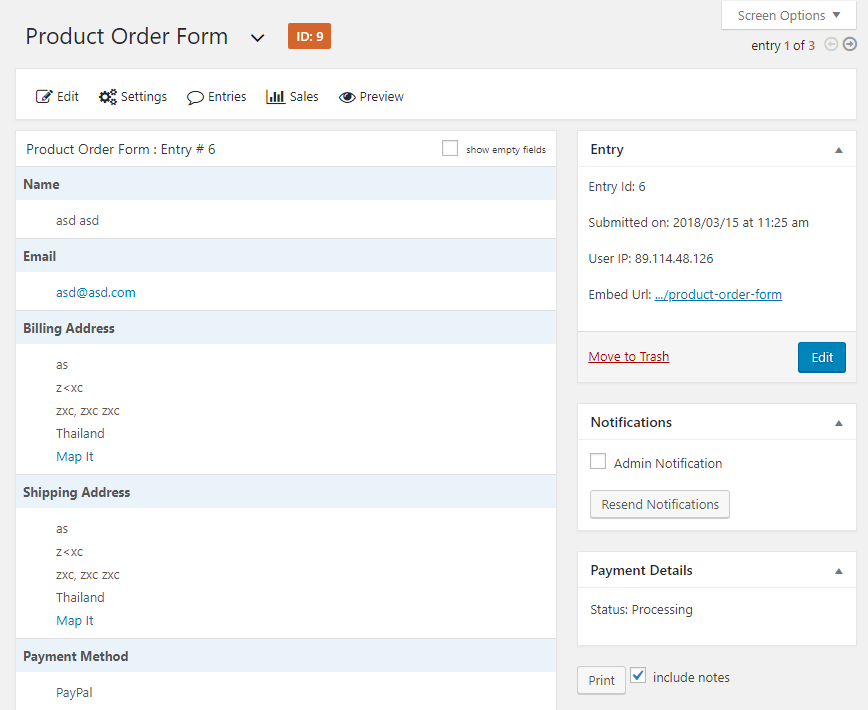
Clicking the “entries” Gravity Forms plugin menu option, or the “entries” link that appears when you hover over a form title on your dashboard will load a new page of entries.
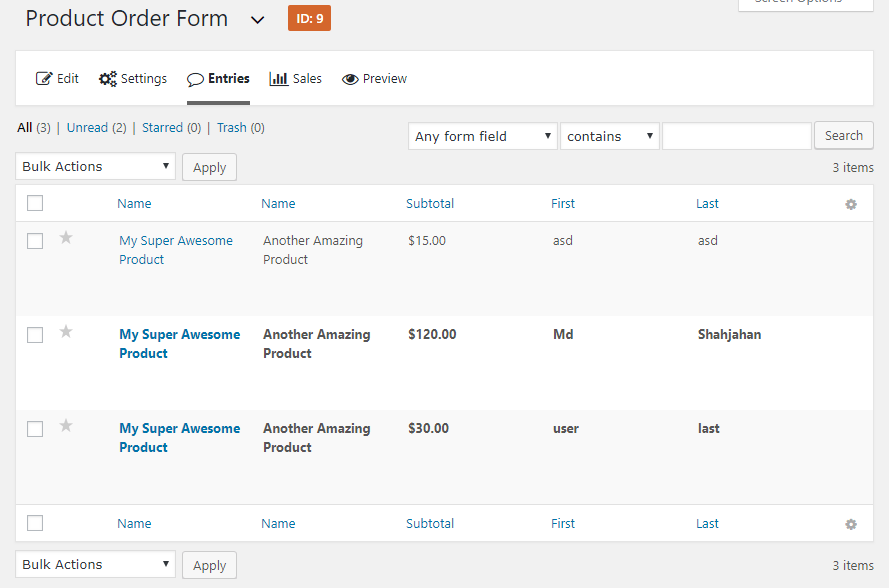
The base entries form is just a summary, but clicking one of those entries will load another page with full details:
If you’ve installed any payment fields integrations (e.g. PayPal), there will be a separate reporting tab for sales.
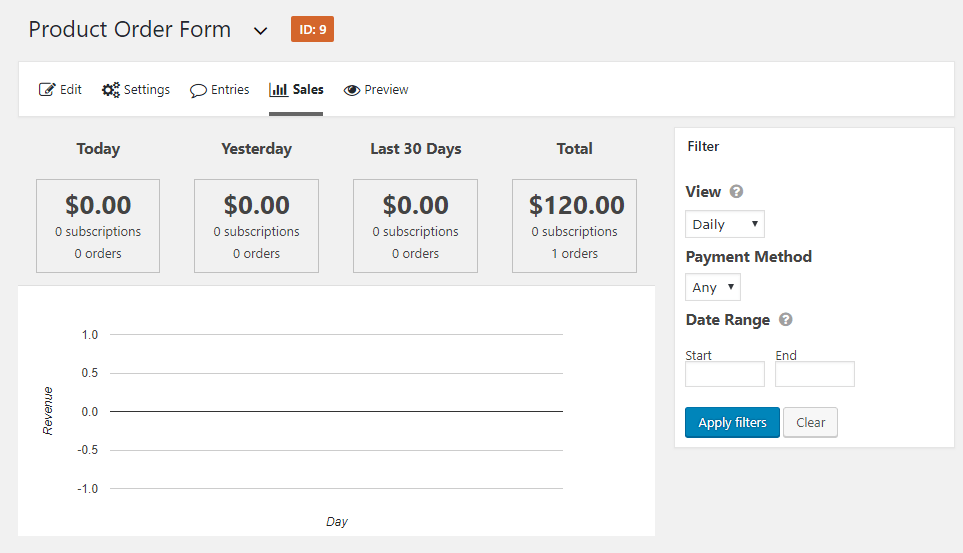
This will give you a graph of orders over time, plus a table underneath all the individual orders. Overall, Gravity Forms has all the data and analytics most people will need.
Ninja Forms
The only way to view form submissions in Ninja Forms is through the “submissions” menu option:
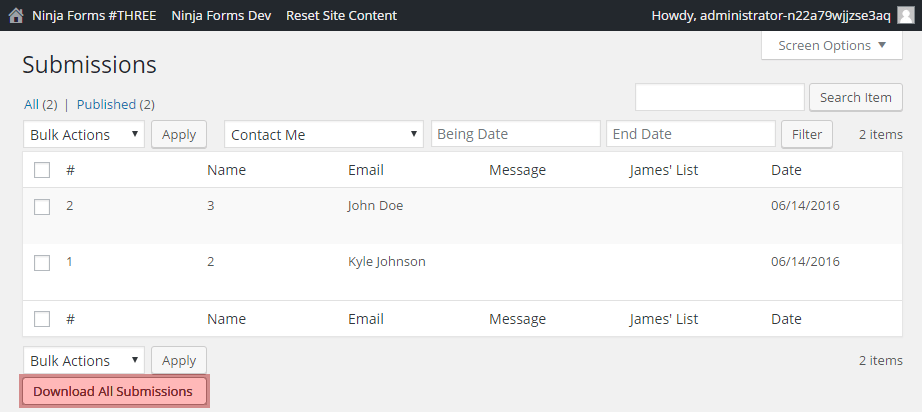
It shows you all the entries in table form, but that’s it. It meets the minimum requirements for form analytics in a plugin but could be improved.
Advanced Features and Add-ons
Several extensions for both Gravity Forms and Ninja Forms aren’t integrations with other product fields, but extra functionality in the form of advanced features.
I can’t go through all of them here, but both share certain popular advanced forms features.
Conditional Logic
Conditional logic lets you create dynamic forms. If a certain trigger condition is met, you can specify an action. For example, you can use it to displace certain fields depending on the option a user picks from a dropdown menu.
When you expand a field in the Gravity Forms form builder, there’s an option to enable conditional logic in the advanced tab. It’s reasonably straightforward. You can show or hide that specific field based on any activity for any other form field so far.
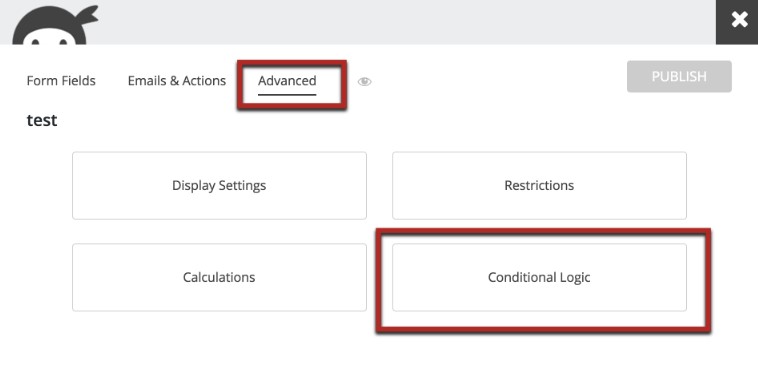
In Ninja Forms, you can do the exact same sorts of things: If you have the conditional logic plugin, you’ll find its settings in the “advanced” tab of the form editor. The interface is much prettier than in Gravity Forms, but the elements are virtually identical:
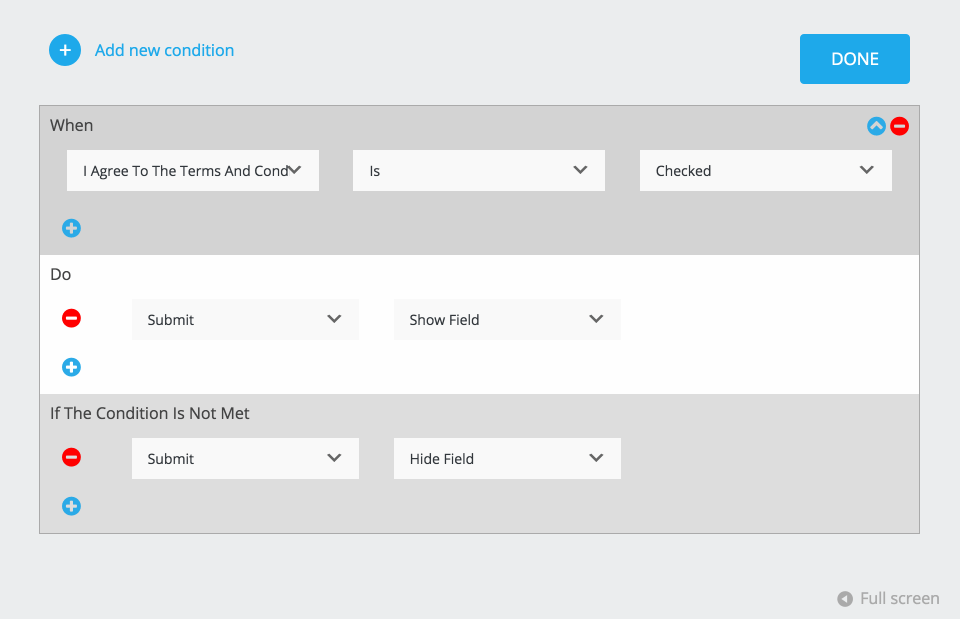
You define a condition based on one field, and that can be used to specify what should happen to fields later on. It’s a bit more intuitive of a layout than Gravity Forms, and it’s nice to see all conditional logic in one place, so I’d give a small edge to Ninja Forms here.
Multi-Part Forms
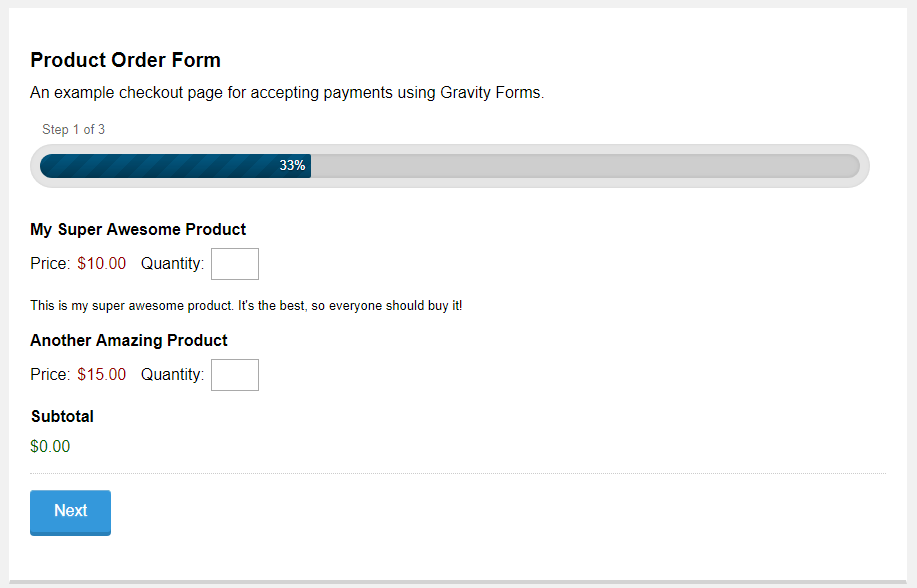
Dividing forms up into multiple smaller pages can improve conversion rates since it seems like less work to users. In Gravity Forms, there’s a “page” element in the standard fields section that you can drag onto your form. Putting this field anywhere in your form creates a new page, and you can have as many pages as you’d like (unlimited forms).
When you preview it, you’ll see that a “next” button has been added at the bottom of your form instead of a “submit” button. There’s also a progress bar that shows how many pages you’ve added.

In Ninja Forms, you’ll need an add-on to create multi-page forms. If you have it, you’ll see a grey plus sign in your form builders. Each time you click this, a new page is added:
When you add new pages, a page navigation menu is added to the bottom. This makes navigating between pages on a long-form easier than in Gravity Forms, which would require tons of scrolling. Both plugins make it easy to add multiple pages, and the end result is the same. No big edge either way unless you like the look of one approach more than the other.
Spam Protection
If you’ve ever created a basic HTML form of your own, you know that you’ll be flooded with spam submissions made by bots if you don’t implement protection.
Both Gravity Forms and Ninja Forms offer Google reCAPTCHA.
In Gravity Forms, there’s a “CAPTCHA” field you can drag onto your form under “advanced fields”. It ends up looking like a standard human check. In Ninja Forms, this feature is included in the free plan. You can find is under “miscellaneous fields”:
Both offer good spam protection through this feature, and there’s no big difference between the two plugins here.
File Uploads
Most sites that rely on user-submitted content need to allow users to upload files. Both of these plugins offer the ability to add file upload buttons to forms. In Gravity Forms, there’s a “file upload” in advanced fields. By default, it’s not the prettiest option, but it works.
The file will be saved on your WordPress server, but you can also use an add-on (like the Dropbox Add-on) to upload the file to a third-party server instead.
If you have the file uploads add-on in Ninja Forms, you will see the “file upload” field under the common fields in the form builder. You can choose to save to your media library or save the file to an external service. Again, virtually identical.
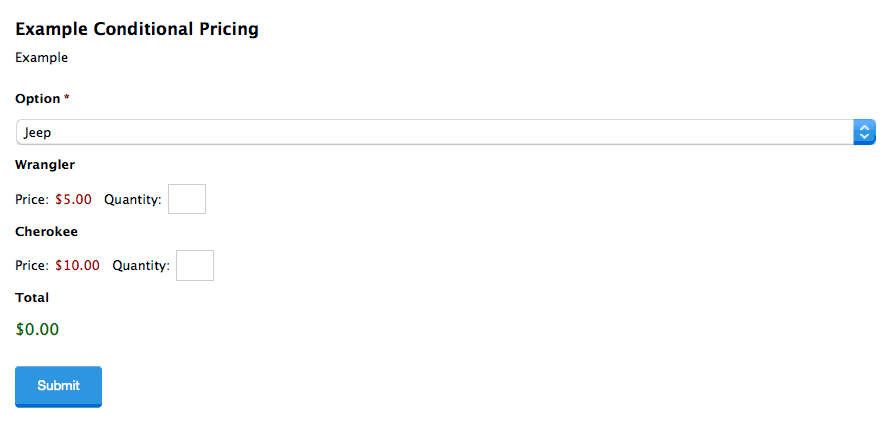
Calculations
Sometimes it’s nice to create dynamic fields based on calculations. For example, you could create a project estimate form that takes in the number of hours someone would like to hire you for and show the user an estimate based on a simple calculation.
In Gravity Forms, calculations can only be made based on number fields. Once you have multiple fields, you can add a third one and choose the “enable calculation” option. Using the “insert merge tab” option, you can insert the values of those previous fields, and apply basic operations to them:
When a user enters the first 2 number fields, the total is automatically updated. Ninja Forms also offers calculations as an add-on. The calculations can be based on any fields that accept a number input (not just “number” field inputs). You’ll add calculations through the advanced tab of your form:
To use it, you create a variable name in the name field that will be the result of some calculation based on existing fields:

The process looks very similar to Gravity Forms. To use the value, you’ll have to add an HTML form to your field and insert that variable name in curly braces.
The Ninja Forms documentation on calculations is very good, and you’ll need it the first few times. Calculations in either plugin aren’t exactly intuitive, but also not too complicated once you understand them. There are no big differences here.
Multi-Column Layouts
Finally, a common feature it to put smaller fields together in a row to minimize the space needed. This is not included in Gravity Forms, but you can use an unofficial third-party plugin to enable this functionality. In Ninja Forms, this feature is included in an add-on. It lets you easily put two or more fields in a single row:
If this is a feature you’re looking for, I’d suggest going with Ninja Forms, which you don’t need to rely on an unofficial plugin for.
Customer Support
I’ve found that when using any sort of “advanced” tool, there are many times where things don’t work as they should. This is especially true for these two as they are far beyond a simple contact form or signup form. That’s why good support is important if you want more than the most basic contact form (e.g. a free WordPress contact form or WordPress Forms Plugin).
Gravity Forms
Gravity Forms doesn’t offer any phone, chat, or email support. If you really need help, you can open a ticket, but you’re not getting immediate help. Your other option is to try and find an answer in the documentation. Some of it can be found in the “help” section of the plugin itself:
For some reason, you’ll find way more documentation on the Gravity Forms website itself. The articles themselves are well-written, but there are not very many of them. Few contain any troubleshooting instructions or guides to unique cases. So if you run into a strange problem, a ticket is your best bet. Overall, those are some weak support options.
Ninja Forms
You can submit a support request (email/ticket) through the premium plugin backend if you need help. But support is only available Monday through Friday, from 8 AM to 4:30 PM EST. Just like Gravity Forms, you’ll likely end up at the documentation.
I’m impressed by Ninja Forms’ knowledge base. They have high-quality video walkthroughs of well over 50 topics. They also have well-written guides to doing a wide variety of things, with detailed instructions and clear images.
So while the live support options are still weak, the documentation is very good. Both Gravity Forms and Ninja Forms could improve in this area, but I’d give Ninja Forms the edge.
Gravity Forms vs Ninja Forms: Which Builder Should You Choose?
It should be clear that both plugins are solid form builders and offer most of the functionality that you’ll ever need. Both go WAY beyond standard contact form plugins or Google forms contact form, particularly as a WordPress Form Builder.
So which one is right for you? Let’s summarize each section one last time:
Aspect |
Winner |
Reasoning |
Pricing |
Gravity Forms is usually cheaper. However, Ninja Forms lets you buy individual plugins, so it can work out to be cheaper if you only need 1 or 2 specific features. Ninja Forms also offers a free plan, Gravity Forms does not. |
|
Installation |
No winner |
Both are easy to get up and running. |
Core form builder |
Ninja Forms (slight winner) |
Both are simple to use and offer a wide variety of fields. Ninja Forms has a nice user interface and gives you more control over CSS classes of elements. |
Integrations |
No winner |
Both offer a wide variety of integrations with email marketing tools and CRMs. However, Ninja Forms is continually developing more, so they may have a better library in the future. |
Reporting |
Ninja Forms shows you entry data, but nothing more. Gravity Forms shows you views and entry statistics on the dashboard and offers a bit more insight. |
|
Advanced Features |
No winner |
Both offer all the most common advanced features that most users will need. |
Customer support |
Both could stand to improve on their live support options. However, the Ninja Forms documentation is excellent, while Gravity Forms’ documentation could be improved. |
There’s no clear winner to me in this head-to-head contact form builder matchup. Of course, you may also just prefer the look and feel of one over the other.
Bottom Line: If I had to pick an overall winner, I’d go with Ninja Forms. Their interface is cleaner and a bit easier to use, and certain advanced features are also a bit easier to use, especially as you move beyond a basic contact form as a Gravity Forms alternative.
If you don’t have a clear choice in mind at this point, I’d recommend breaking down the advanced features you need, and then seeing how much it would cost for each tool.
Personally, I much prefer the easier-to-use visual form builder on NinjaForms AND the more responsive customer support. No pressure, but if you are stuck then go with NinjaForms.

Thanks for such a detailed review of Gravity Forms Vs Ninja Forms.
I have used both of them extensively and Ninja Forms resulted in a bad experience for me. When they upgraded to v3.0 then this resulted in breaking all the 3rd party addons I had for it. In that release, they changed their whole backend code. The only option left was to stay on the old version or upgrade and break Compatability with 3rd party addons.
I have never faced any issues like this with Gravity Forms. Also, I find there are more 3rd party addons for Gravity Forms as compared to Ninja Forms. Moreover, 3rd party developers are easily available to build functionality if it doesn’t exist.
I am not good at coding so, I looked for ways to design the forms but couldn’t find FREE solution for Ninja forms but for Gravity Forms, I found a free plugin in WordPress repository. ( https://wordpress.org/plugins/styles-and-layouts-for-gravity-forms/ ). For Ninja forms you have to buy their addon ( https://ninjaforms.com/docs/layouts-and-styles/ ).